There is perhaps no feeling more frustrating in home renovation than reaching the final corner of a beautifully tiled bathroom floor only to realize you are exactly two tiles short.
The panic sets in immediately. Is that specific tile still in stock? Do the dye lots match? Will you have to drive across town or wait weeks for shipping, just to finish a 12-inch square of flooring?
On the flip side, buying too much tile is a budget killer. If you overestimate your needs by 30%, you could be left with hundreds of dollars worth of heavy boxes sitting in your garage that you can’t return.
Learning how to calculate tile square feet accurately is the most critical step in any tiling project. Whether you are installing a subway tile backsplash, a porcelain bathroom floor, or a slate patio, the math has to be right.
While you could grab a notepad, a pencil, and a dusty calculator to crunch the numbers manually, there is a faster, more accurate way. In this comprehensive guide, we will walk you through the measuring process, explain the tricky concept of “waste factors,” and show you how to get a perfect estimate in seconds using the CalcGami Tile Calculator.
Table of Contents
Why Manual Calculations Are risky
Before we dive into the solution, it is important to understand why the “old school” method often leads to errors.
The basic formula for area is simple:
However, real-life renovations are rarely simple. Here are the variables that trip up even experienced DIYers when doing manual math:
- Unit Confusion: Measuring in inches but needing a result in square feet requires conversion (
Inches÷144Inches÷144). One decimal point in the wrong place throws off the whole project. - The “Box” Dilemma: Tiles aren’t sold by the foot; they are sold by the box. If a box contains 14.5 square feet and you need 100 square feet, how many boxes is that? (Hint: You can’t buy 6.8 boxes).
- Complex Geometry: Few rooms are perfect squares. Closets, kitchen islands, and vanity nooks require you to calculate multiple areas and add them together.
- The Waste Factor: This is where most people fail. Forgetting to account for the tiles you will inevitably cut or break results in a shortage.
Instead of risking a math error that costs you money, using a specialized tool eliminates the guesswork.
Step 1: Gather Your Tools and Prep the Room
Even with the best calculator in the world, you need accurate inputs to get accurate outputs. Before you open the CalcGami tool, you need to get your physical measurements right.
What you will need:
- A Retractable Tape Measure: Ideally a 25-foot tape for floors.
- A Laser Distance Measurer (Optional): Great for large rooms or high ceilings.
- Grid Paper: Helpful for sketching out odd-shaped rooms.
Prep the Area:
Clear the floor of loose items. If you are measuring a wall for a backsplash, clear off the countertops. You need to be able to run your tape measure from wall to wall in a straight line without bending it over furniture, which distorts the measurement.
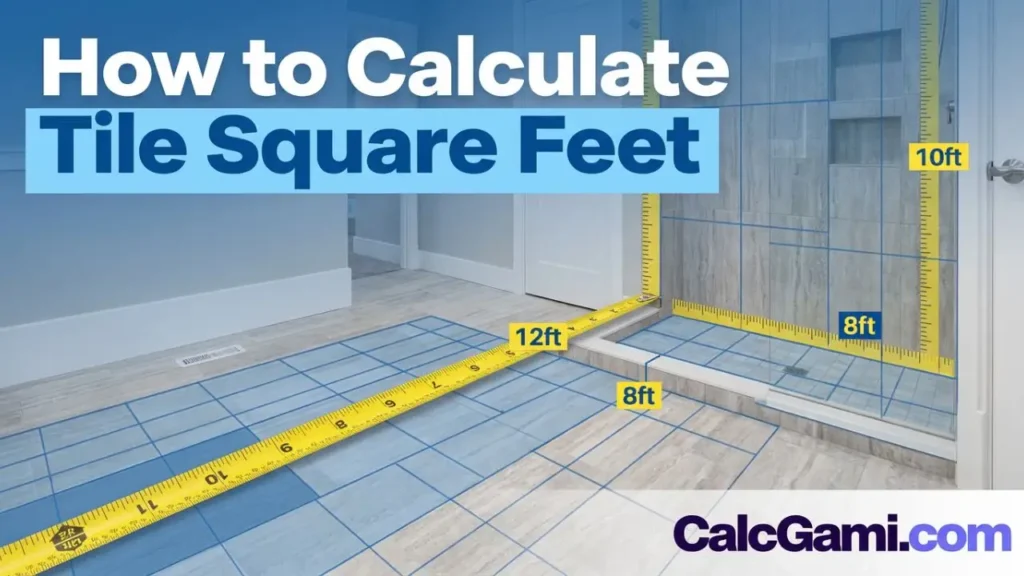
Step 2: Measuring Your Space (The Right Way)
To use the calculator effectively, you need to know the dimensions of your coverage area.
Scenario A: Standard Rectangular Rooms
This is the easiest scenario. simply measure the length of the room and the width of the room.
- Tip: Round your measurements up to the nearest inch. Do not round down.
Scenario B: L-Shaped or Complex Rooms
If you have an L-shaped kitchen or a room with a large nook, do not try to measure it all at once. Use the “Divide and Conquer“ method.
- Visualize the room as two or three separate rectangles (Section A, Section B, etc.).
- Measure the length and width of Section A.
- Measure the length and width of Section B.
- When using the CalcGami Tile Calculator, you can calculate these separately and sum them up, or if the tool supports multiple areas, input them sequentially.
Scenario C: Walls and Backsplashes
For walls, measure the height and width of the wall.
- Important: If you have a window or a door in the middle of the wall, measure it separately. You can subtract this area later, but many professional tilers recommend keeping that square footage in your total calculation to act as a buffer for trim pieces and intricate cuts around the frame.
Step 3: Understanding the “Waste Factor” (Overage)
This is the most important section of this guide. If your room is exactly 100 square feet, and you buy exactly 100 square feet of tile, you will run out.
You must purchase “Overage” (also called the Waste Factor). This accounts for:
- Cuts: When you reach the wall, you will likely cut a tile. The remnant piece might be too small to use elsewhere, meaning it becomes waste.
- Breakage: Tiles can crack during shipping or while you are cutting them.
- Defects: Occasionally, a tile in the box will have a chipped corner or a glaze flaw.
- Future Repairs: It is wise to keep a box of spares in the attic in case a pipe bursts or a heavy pot cracks a tile five years from now.
How much overage do you need?
- 10% Overage: Standard for basic grid or brick patterns in square rooms.
- 15% Overage: Recommended for rooms with many corners, pillars, or obstacles.
- 20-25% Overage: Required if you are laying tile diagonally (diamond pattern). Diagonal cuts produce the most scrap waste.
Step 4: Using the CalcGami Tile Calculator
Now that you have your measurements and you understand overage, it’s time to let technology handle the math.
Here is the step-by-step process to get your number:
- Select Your Shape: Choose whether you are measuring a rectangle or a different shape.
- Input Length and Width: Enter the feet and inches you measured in Step 2. (e.g., 10 feet, 6 inches).
- Choose Your Tile Size: Are you using squares? planks? Entering the tile size allows the calculator to tell you exactly how many individual pieces you need.
- Set Your Waste Percentage: Use the slider or input field to add that crucial 10-20% buffer we discussed.
- Enter Price (Optional): If you know the price per square foot or per box, enter it to get an instant budget estimate.
Once you hit “Calculate,” the tool instantly converts your inputs into the three numbers you actually need for the store:
- Total Square Footage (Net area + Waste).
- Total Boxes Needed (Calculated based on box coverage).
- Estimated Project Cost.
Common Tiling Mistakes to Avoid
Even with a calculator, being aware of these pitfalls will save you headaches.
1. Ignoring Grout Joint Width
Technically, grout lines take up space. A 1/2-inch grout line over a large floor adds up. However, never subtract space for grout lines when calculating how much tile to buy. Treat the grout area as “bonus safety stock.” It is better to have slightly too much tile than to rely on the grout width to make your tiles fit.
2. Not Checking the “Square Feet Per Box”
This varies wildly by manufacturer. One box of subway tile might cover 10 square feet, while a box of large-format porcelain might cover 16 square feet. Always check the label. The CalcGami tool helps you convert your total footage requirements into box counts so you don’t have to do the division in your head.
3. Buying From Different Dye Lots
If you calculate incorrectly and have to go back to the store a week later, the new boxes might be from a different “batch” or “dye lot.” This can result in a slight color variation that is painfully obvious once installed. This is why getting the calculation right the first time, with the help of our calculator, is vital.
Frequently Asked Questions (FAQ)
How do I calculate square feet for a shower?
For a shower, you need to calculate the floor (pan) and the walls separately.
Floor:
Walls:
Ceiling:
Add all these numbers together in the calculator to get your total requirement.
What if my room is not square?
If your walls are not perfectly 90 degrees (which is common in older homes), measure the width at three points: one end, the middle, and the other end. Use the longest measurement for your calculation. This ensures you have enough tile to trim down to fit the slanted wall.
Does the size of the tile affect the waste factor?
Yes. Larger tiles (like inches) often result in higher waste percentages than smaller tiles (like mosaics). This is because cutting a large tile to fit a small corner renders the rest of that large tile useless, whereas small mosaic sheets are more flexible. If using large-format tiles, lean toward 15% overage.
Conclusion: Start Your Project with Confidence
Renovating your home should be exciting, not stressful. By taking accurate measurements and using the right tools to interpret them, you remove the risk of budget blowouts and stalled projects.
Don’t leave your flooring project to mental math or rough guesses. Ensure you have the exact amount of material you need to finish the job beautifully.
Ready to get your numbers? Click here to use the free CalcGami Tile Calculator and start your project today!